In this post, I am going to touch on several methods of analysis used in discovering how a potentially malicious program functions. In this case, I have selected a covert surveillance program called SpyKing. The marketing hype concerning this program states:
"SpyKing Vista Spy secretly logs all keystrokes, web sites, emails, chats & IMs: MSN Messenger, Windows Live Messenger, ICQ, AOL Messenger, AIM, Yahoo! Messenger, Windows Messenger and Skype. Takes screen snapshots at every X seconds like a surveillance camera. Displays exact activities, like MySpace, Facebook, PC games, online searches & shopping, file transfers and webmails. You can receive reports remotely via emails or ftp."
As you can see from the image below, the site has been reported as a known attack site with a number of malicious scripts being located on their system.

There is a trial and a commercial version of the software available. For this exercise, I have used the paid commercial version in order to gain the complete set of utilities and have all the features. This way there is little chance that the software will be located due to a trial feature that is removed in the commercial product.
A good number of the windows tools are either listed with the source or are from Sysinternals. In either case, these are free tools. I shall concentrate on the process instead of the results in this post as this will enable you to do your own analysis of other programs (and not to just rely on the work of another).
For this analysis, I have configured a Windows XP VM on my RHEL host. This is a clean host with no updates as yet. At present there is not a great deal going on in the system. From a networking perspective we can see a number of basic Windows ports listening.

Next, I am creating an initial snapshot of the "AutoRuns". These are the settings, programs, codecs etc that are loaded when Windows boots or when a number of other events occur (such as opening Internet Explorer).

By saving the complete list, we can take snapshots (before, during and after) of the installation process. In this way, we get a list of the changes that have occurred on the system. We can isolate these and then associate them with the effect. To do this effectively, we need to capture a complete set of changes to the system. In Windows, this means the registry (below we are using the SysInternals Registry Monitor tool to capture all registry activity) and many other areas of the system.

In addition, RegShot can be used to take before and after snapshots of the system as well as to create a comparison of the changes.

We start with a before snapshot on our pristine system clicking "1st shot".

Later, following the install, we take another shot and at each shot, save the capture.

Following the installation, RegShot will also allow us to directly compare the changes to the system.

In addition to the registry, it is essential to monitor the file-system. From the image included below, we can see data being written to the "C:\Program Files\SKPCS\data" directory. This is the location where Spyking is saving data (more on this when we have covered the installation process).

At the same time, we also monitor system processes. To capture the network information, we setup a capture using tcpdump with a host filter on the underlying linux system (that our VM's are running on).
Installing the software
Now that we have setup the monitoring tools, we will want to install the SpyKing software and capture what occurs in this process.
Start with the registered version of the software.

We can see from process explorer that SpyKing spawns a separate process (is-S3N8.tmp).
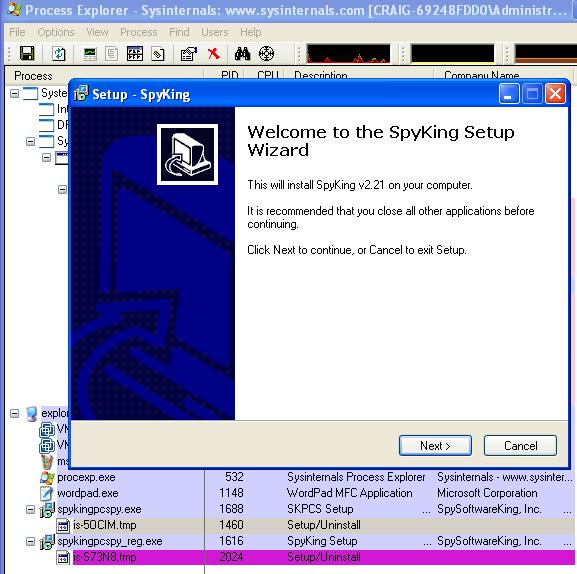
In this case we use the default folder. This is configurable and should only be used as an indication, not a definitive signature.

As an exercise, I also attempted to reinstall SpyKing over a running version of the software.

Note that the folder may be hidden, but you still receive error messages if you attempt to write over it.

So now back to the install. Here we have selected the default install folder.

And we have installed the program successfully. Next comes the unlock section. Here we enter the details of our license. Without this, SpyKing runs in demo mode and leaves a visible sign of being installed.

Once we have unlocked it, we are taken to the setup wizard.

Here we will monitor all activity. In this configuration, SpyKing is far more verbose and far easier to recover. The longer it is run and the more that it logs equals the easier it is to find information.

In the second step of the wizard we set the ?hotkey'. This is used to ?unhide' the program and make it available.

Finally, we setup the location of the logging. Setting a spoofed host is simple (to act as an email server) and we can record the activity of the program. The information in these emails can be used as a signature for network detection. This would have to be validated against multiple versions of the software before relying on this and it will also do little against other spyware programs. The emails and logs are clear text however. This does make network based detection relatively simple.

And we are ready to roll.

Incidentally, when we setup the program, the licensed version uses an online activation.

In the setup, it must be noted that the installation program sets up a UDP listener.

This is bound to the localhost and no traffic was monitored to or from this port from the outside. More research should be made on what exactly this process does.
Well let's log into the software.

Installed and Running
Now that we have logged into the program, we are taken to the admin screen. Note that this is a registered version — this however still provides the option of purchasing more licenses online.

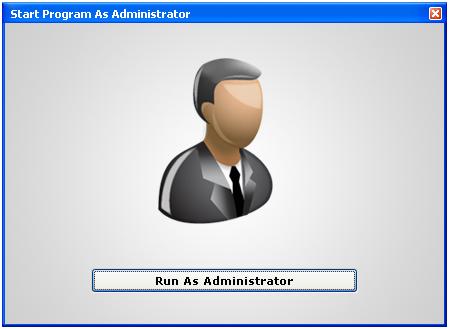
This interface allows us to set individual actions for each of the monitoring sub-systems. We shall accept these options and look at a few options. First, there is an option to run the program as Administrator. This is where the program is most effective.
Then as another example, we have the advanced admin section. We see that the hotkey is ALWAYS a combination of "Ctrl + Alt + *" where * is a key of the users choice. This is not a function key.
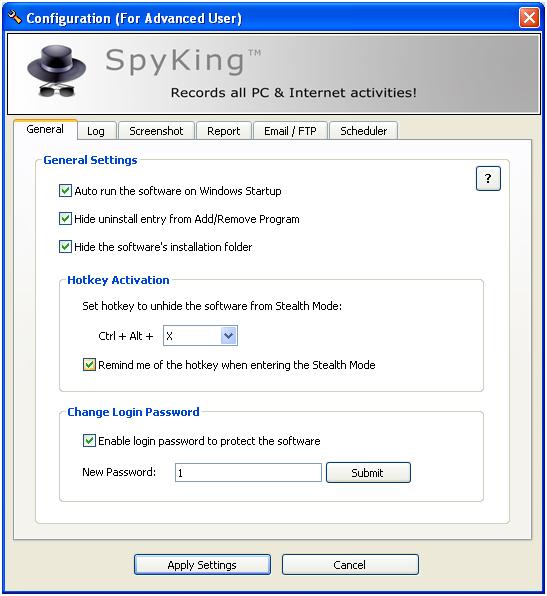
Hence, a user has a means of checking for the program. On top of this, a simple scanner hooking into the input function of the system could scan for all possible combinations in seconds.
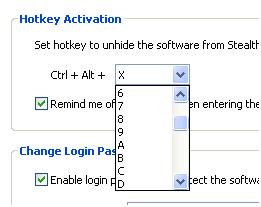
The list is a drop-down selection of 10 numerals and the 26 alpha keys. This is a total key space of 36 characters. The shift key does not come into this and detection for a home user is as simple as hitting 36 key combinations. In fact, the reality is that this is a key space of less than 36 characters as some combinations are already selected and used by other system functions.
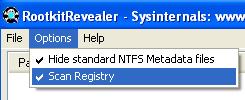
Next, with the program running in stealth mode I installed and ran the rootkit revealer program. This was used with the complete options selected:
Here we have a couple strange entries, but nothing serious.
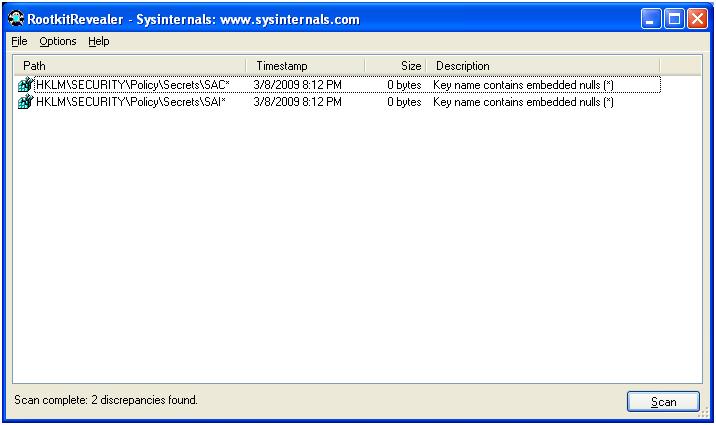
Basically, the spyware program does not embed itself that deep into the system and kernel that it is detected as unusual.
But why a VMWare image?
There are several reasons for conducting analysis in a VM, one of which is it is simple to capture network traffic. Next is that you can setup a host once and use snapshots to gain several images and even reverse any mistakes you may make.
One strange occurrence that will require further investigation is the discovery of the Linux TcpDump command strings used on the host system being discovered in the PageFile of the system being monitored. My understanding was that this should not occur. Once we have this data, we can take the pcap network trace that we saved using tcpdump and run it through other tools. In this case, I used the following tools to analyse what was occurring:
- NTop (Produces a graphical summary of traffic and destinations)
- DNStop (Summarises the domains and name lookups found in the network capture file)
- Wireshark (provides a detailed graphical view of the data after the fact)
- TCPReplay (Allows for the reconstruction of files from the network capture)
Below we see a snapshot of our ?chatty' spy program.
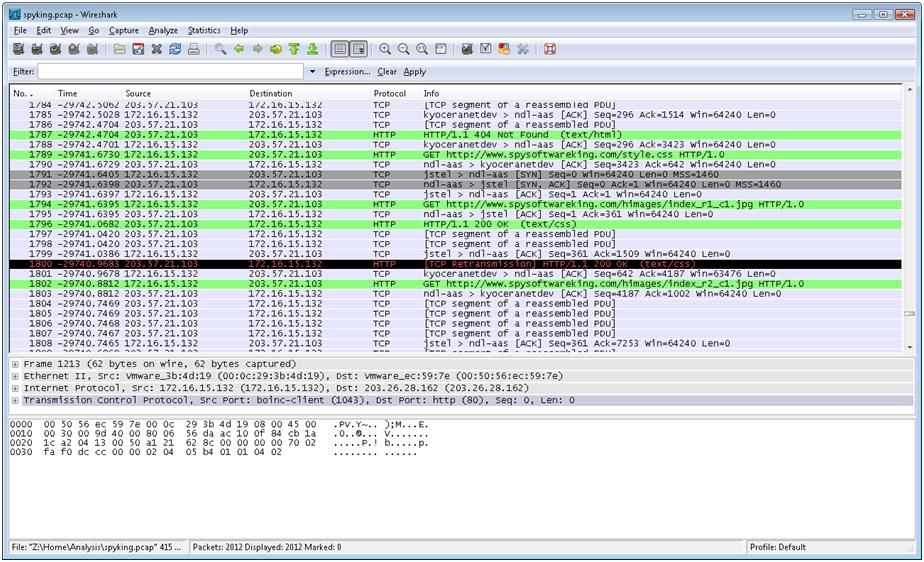
With a series of network captures, we see the emails, ftp and other traffic that is leaking the information from our host.
Analyzing the Running processes
We see from "Process Explorer" that the ?symserv.exe' is listing on PID 1592. This process ID does vary, but it is possible to locate the processes and threads used by SpyKing as it is running.
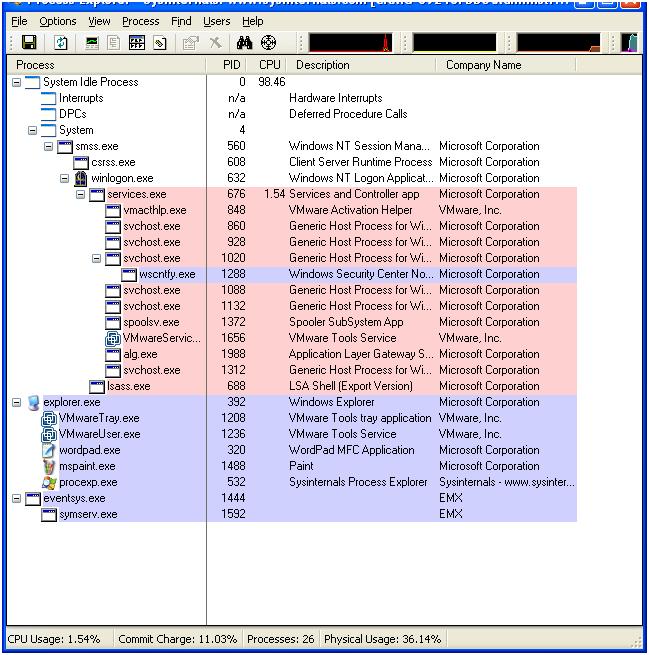
The PE Header information of this program makes a simple signature (far more effective than the presence of the default directory). With the Hex data from the PE Header, you can search the used and unused space on the drive image and discover this program (if it is installed).
What about when we uninstall the program?
Of course in attempting to remove the program we do not find that it is in the "Add / Remove Programs" list.
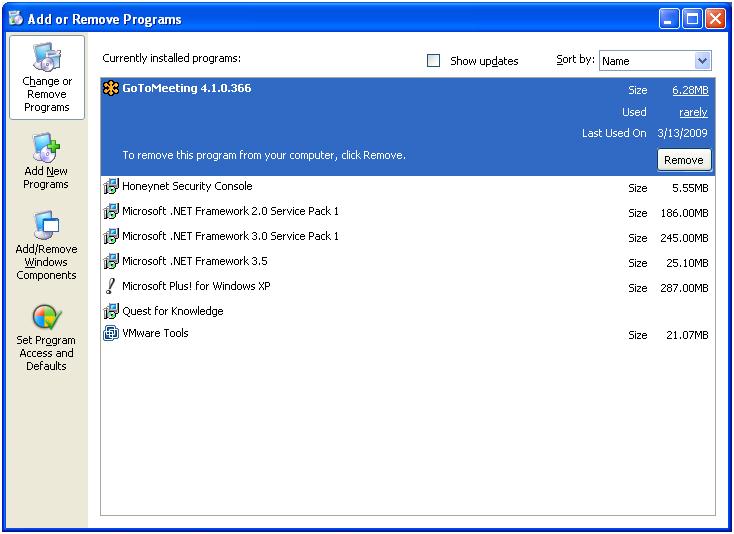
We instead have to use the uninstall provided with the software.
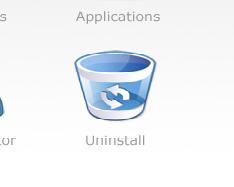
Clicking this takes us to the removal process.

And we are sure.

So it is now removed.
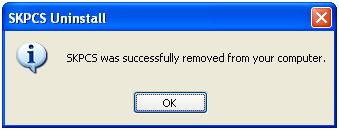
At least from a normal user perspective it is removed.
With snapshots of the program installed and also with it removed, we now proceed to imaging the various systems.
Lastly, the drive images
In this case, the drive images are simple to analyse. Some programs hide themselves in "non-standard" structures, SpyKing is not one of these. Using the Helix CD image, dd for capture and the Autopsy forensic browser, the recovery of the program was simple.
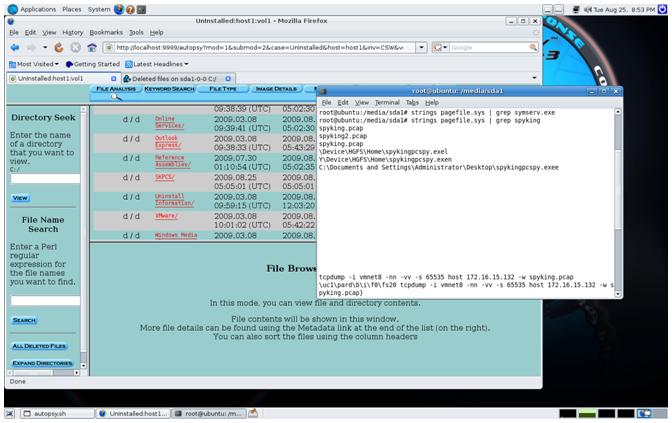
In the image above, we see the deleted "C:\Program Files\SKPCS" directory for the system we had uninstalled the program from. The program, sysserv.exe which forms a part of the running SpyKing program is no longer in the pagefile, but a number of strings related to this program can still be found a day later (subsequent to removal and a single reboot).
Below we see the image and analysis of the system that had SpyKing running (this was not yet removed).
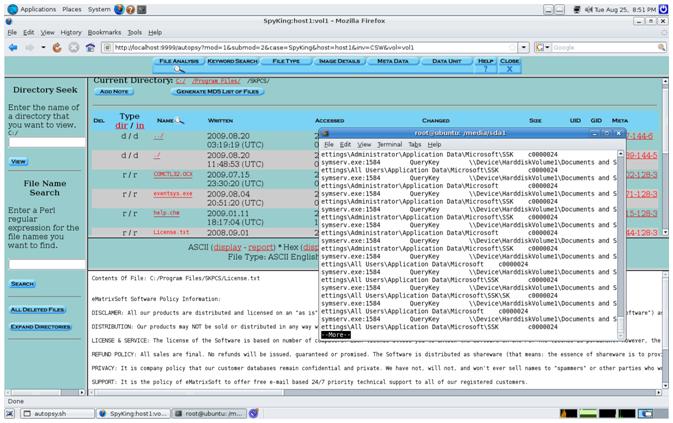
The program directory (although hidden when in Windows) is simple to find. On top of this, there are copious amounts of data related to the SpyKing program in the pagefile.
For a spyware program, this is a really large footprint.
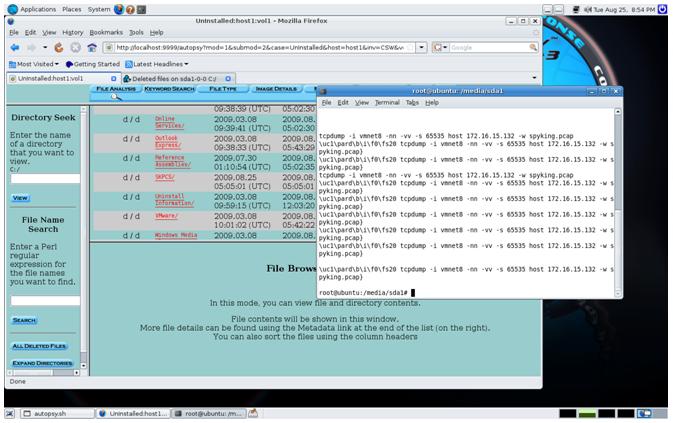
What was most unusual (and this can be seen in the image above) was the inclusion of the command that was run on the Linux host being uncovered in the Windows VMWare client. The linux memory and commands have been incorporated into the Windows VM host pagefile. This is so far something I have only been able to replicate on these hosts and is something that will require further research.
We have little information from the Autoruns program in this instance, but there is a voluminous trail of access information from the registry, process and file monitoring programs.
The result is that the best indication is to capture data at the network choke points. Where this is not feasible (or the analysis is after the fact), the review of file signatures is the next best option. This requires a binary search. The entire file of each of the binaries can be hashed and added to a known bad list, or alternatively, the PE header including the program optional headers can be used. The best programs to detect include:
- eventsys.exe
- symserv.exe
The sub-folders of the program should also be recoverable to see what has been leaking:
- data
- logs
- scrshot
There are a number of programs that use the "symserv.exe" executable as a simple web search will demonstrate. There is a good likelihood that the person installing this software could also lose control of it creating a RAT on the system. As a consequence, this is not even a good option for the monitoring of your own system, let alone the issues connect to monitoring the systems of other people.
Conclusion
For all of the hype, SpyKing is simple to find. The program leaves a large system footprint for a ?spyware' system. It does not clean up after itself and has no covert network capability. Traffic is not encrypted or even XOR'd, so it is simple to set network based filters for this traffic. A BPF with TCPDump could be created to monitor for this without effort and a simple filter could easily be implemented on a pf or IPTables firewall to stop this connection and hence the leak.
Worst of all (or best depending on your opinion and goals), the software is simple to find in the registry and from a drive image — both when installed and after it has been removed.
Craig Wright is a Director with Information Defense in Australia. He holds both the GSE-Malware and GSE-Compliance certifications from GIAC (and the GSE as well). He is a perpetual student with numerous post graduate degrees including an LLM specializing in international commercial law and ecommerce law as well as working on his 4th IT focused Masters degree (Masters in System Development) from Charles Stuart University where he is helping to launch a Masters degree in digital forensics. He is involved with his second doctorate, a PhD on the quantification of information system risk at CSU.
