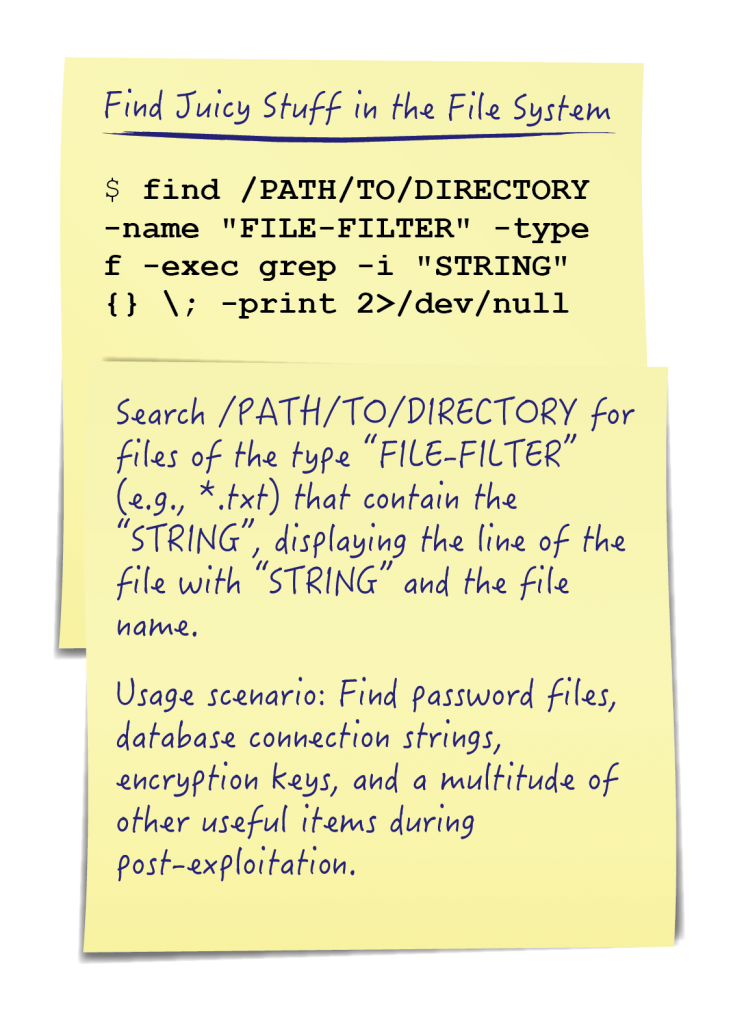
Pilfering data is a post-exploitation phase that rarely receives enough credit. As pentesters, the way we demonstrate security risk and the way we escalate our attacks to a new level is based entirely on what we find after the compromise is realized. While manually driving the command line from directory to directory in an endless cycle of "cd" and "ls" , is a possible solution it hardly scales to an enterprise of hundreds of systems. The first step is to key in on target data types: Do users keep usernames or passwords in text files? Are there configurations we can read that might contain database credentials or hashes? Could there be email addresses or phone numbers to pilfer for use in social engineering efforts? With a little bash-fu we can get the answers to these questions and many more with relatively little effort.
Methods Covered in this Section:
find filtering by path, filename, and permissions
find /path -iname "FILTER" -perm PERM
find with flags used to list or delete files found
find /path -iname "FILTER" -ls
find with grep to quickly identify files of interest
find /path -iname "FILTER" -exec grep -i "CONTENT" {} \;
Find FTW
The "find" command is an incredibly powerful tool available on most Unix derived systems. With it we can quickly search the filesystem to find interesting files. At its simplest, we can use the "find" command to locate files based on file attributes such as modified, accessed or created times, ownership and access attributes, and file type. When searching by file name we can use either the "-name" or "-iname" flags. The flags function the same except for the "-iname" flag makes our search case-insensitive. When using the flags we use glob expressions. So if we want to search the whole filesystem for any copies of the shadow file something like the following would work:
Find filtering by path or filename:
find / -iname "shadow*"
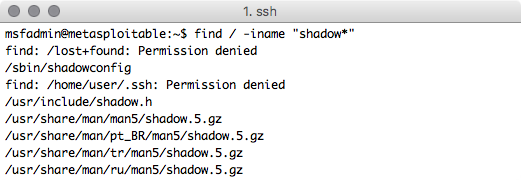
Permission denied errors are no fun
Command Breakdown:
find / -iname "shadow*"
1. find - Command line tool to search for files
2. / - The path that we want to initiate our find from; starting from / will search the entire filesystem
3. -iname - Perform case insensitive search of file names
4. "shadow*" - The shell pattern supplied to -iname; files like /etc/shadow or /etc/shadow.bak will match but /etc/gshadow would not. Note: unlike normal shell expansion leading '.' will be matched by the * character.
When running as a non root user we will frequently get 'Permission denied' errors. In that case redirecting standard error to /dev/null should help us prettify our results. If we want to get a more traditional "ls" style output for each of the files found by our "find" command we can use the "-ls" flag. The fleshed out version of our previous command might now look like this:
Find with flags used to list or delete files found (w/error redirection)
find / -iname "shadow*" -ls 2>/dev/null

The permission denied errors are gone
What if we want to filter for only the files we have the appropriate level of access to actually use? Consider this: Let us say we have an unprivileged account on the target and we are not in the shadow or root groups. We can filter results with the "-perm" flag to find only files where the read flag has been set for others. In order to make this permissions search non-exclusive, that is if the read and write flag is set for others we still want to see it, we have to specify the permissions that we are looking for starting with a "/". So our previous command might now look like this:
Find results can also be filtered by file permissions as well (-perm) flag
find / -iname "shadow*" -perm /o+r -ls 2>/dev/null

We filtered out the /etc/shadow file that was not readable to us due to restrictive permissions. Now we can see that there is a shadow backup file that is world readable! Go grab those hashes and elevate privileges!
Content is King!
The "find" command supports many flags that determine what gets done to each file found by our search parameters. In addition to the "-ls" flag which performs an "ls" on matching files and the "-delete" flag which will delete any matching files there is the "-exec" flag. This flag allows us to run an arbitrary command against each file found from the original "find" command. By using "-exec" to run "grep" or "egrep" on each of the files that our find command locates we can quickly search the file system for email addresses, database passwords, or really any other content of interest that a regular expression can be written to match on.
We can combine the previous find knowledge with "-exec" to look for all .txt files containing a defined password field or variable name with something like:
Find with grep to search for strings inside of files:
find /home -iname "*.txt" 2>/dev/null -exec grep -i 'pass' {} \;
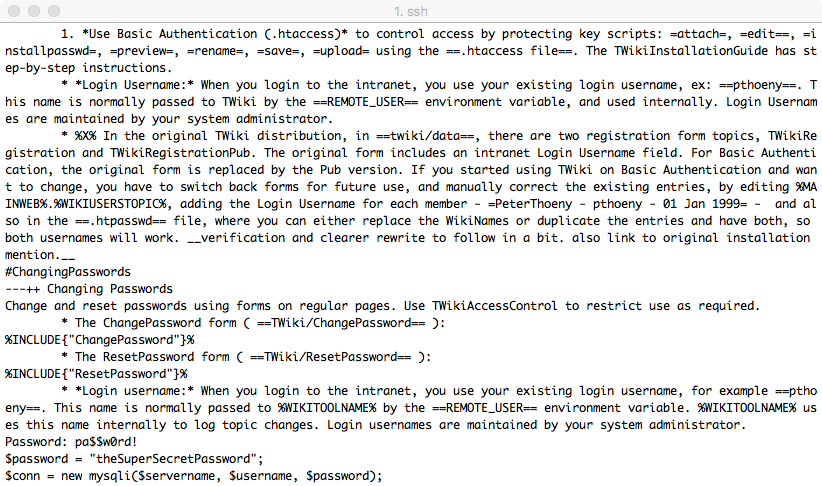
Holy Wall-of-Text Batman! Let's simplify the output to make things easier
Command Breakdown:
find /home -iname "*.txt" 2>/dev/null -exec grep -i 'pass' {} \;
1. find /home -iname "*.txt" 2>/dev/null - same old find-fu from before
2. -exec COMMAND - Specify an arbitrary command to run on each file.
3. {}\; - When using -exec the '{}' will be replaced by the currently found file. Note that the ending ';' needs to be escaped with the ?\' character.
That was a lot of output, if we just want to see which files contained what we were grepping for we can modify our grep command with the -l flag to list the file instead of the matching line:
Find with grep to quickly identify files of interest:
find /home -iname "*.txt" 2>/dev/null -exec grep -li 'pass' {} \;
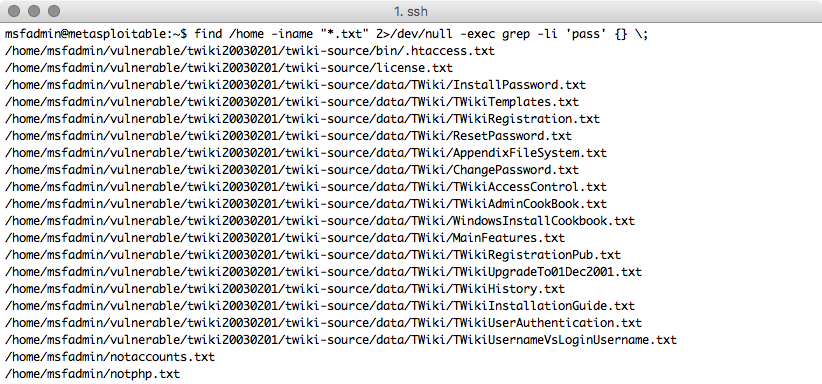
Not perfect but much easier to see which files might contain the information we want
What about if we wanted to search for something a bit more specific than just the phrase 'pass' in a file? Well with "-exec" and "egrep" we can search for any content that we can make a regex for. How about checking for email addresses?
find with egrep to quickly identify files of interest using regular expressions:
find /home -iname "*.txt" 2>/dev/null -exec egrep -li "^.+@.+$" {} \;
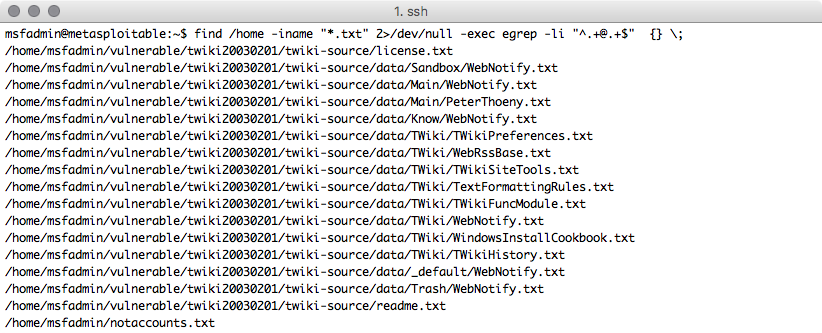
Note: grep -E could be used instead of egrep
We can use the cat command to explore the contents of each of these files, and "grep -C #" to filter for a certain number of lines above and below the desired string. This technique is extremely helpful when searching for contextual information that may not be on the exact same line as our search filter.
Browsing through regular expression sites like http://www.regexlib.com/ can lead to some useful expressions to help us find all sorts of things like email addresses, social security numbers, md5 hashes, UUIDs, phone numbers, and credit card numbers.
NOTE: Some of this information can be highly privileged (especially based on host nation privacy restrictions). Accessing PII and HIPAA information from third party systems can lead to accreditation and compliance troubles. Please exercise caution and seek legal advice where appropriate.
When your ROEs, scope, and plan are solid, happy hacking!
Matthew Toussain
https://twitter.com/0sm0s1z


