Introduction
After hours of digging, you finally reach your goal and exclaim, "I GOT SHELL!" You brush the dirt off your shoulders and suddenly wonder, "Now what?" Fortunately, if it's a Unix system, we can leverage the rich functionality that comes with Bash in order to move our pentest along whilst maintaining our shadowy veil.
Let's first take a moment to evaluate a few potential use cases. The system's external IP address is often a key piece of information for us to consider. It can help us continually appraise our intrusion campaign to maintain awareness of what systems become compromised so that we remain within the narrow scope of our test. Alternately, we might launch an attack against a DNS name that resolves to multiple host IP addresses on the far end and we need to determine which specific IP address we've compromised in order to leverage that access to move laterally within the target environment. Why not just check the IP address assigned to the network interface? As penetration testers most systems we engage live behind a firewall in a Network Address Translation, or NAT environment. In these situations a system's internal IP address may not accurately reflect how they appear on the Internet. Either way, determining ?where' this box is a solid first step in any post-compromise scenario. Let's look at the some common ways to get this info.
Methods Covered in this Section
curl:
curl -4 icanhazip.com
wget:
wget -qO- ifconfig.me/ip
dig:
dig +short myip.opendns.com @resolver1.opendns.com
telnet:
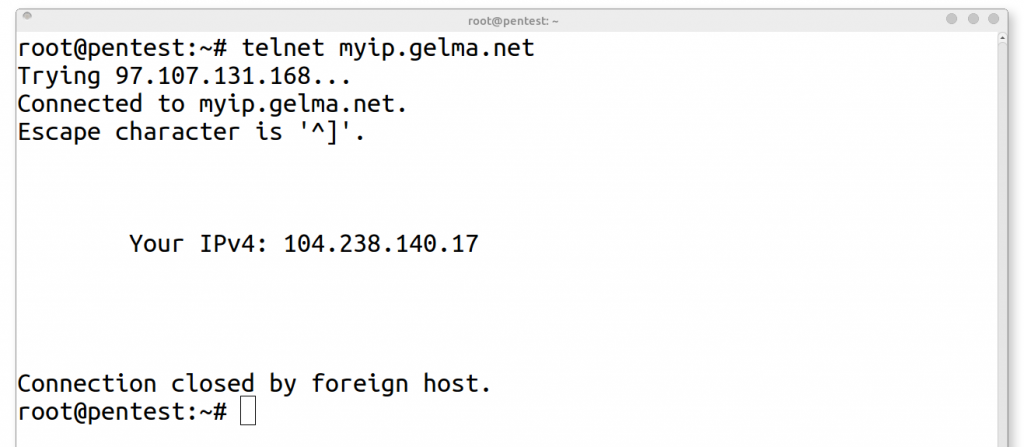
telnet myip.gelma.net
telnet + nc:
nc -vlp 9000
telnet [hostname/IP Address] 9000
telnet web client:
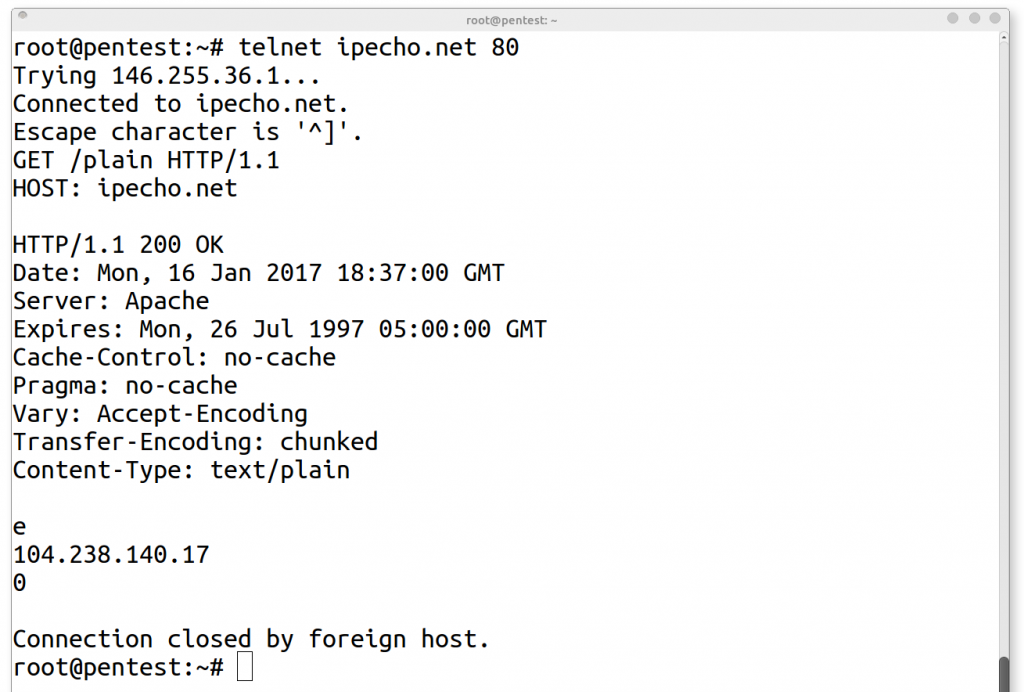
telnet ipecho.net 80
GET /plain HTTP/1.1
HOST: ipecho.net
ftp:
echo close | ftp ifcfg.me
PowerShell:
Invoke-RestMethod http://ipinfo.io/json | Select -exp ip

So many options...
For a typical user learning their public IP address is often as simple as a Google search for: ?what's my IP'. For us this might also be a viable option however, as pentesters, we're often confronted with terminal access as opposed to a graphical user interface and web browser. It might seem like a limitation, but with Bash, there is no such thing! There are tons of different utilities that can reach out and get the info we're interested in. Let's begin by targeting the simplest and most effective options:
- IP identification with command line web access utilities
- curl
- wget
- Using DNS to determine our IP address
- dig
Command Line HTTP External IP Identification
On differentiated Unix type operating systems there are generally two major command line utilities for downloading the content of websites: curl and wget. Depending on which specific flavor is used (e.g. Mac OSX, Ubuntu, etc.), only one or potentially both will be available. For continuity's sake we'll discuss both:
Command Breakdown
curl:
curl -4 icanhazip.com

1. curl - Command line tool that can make web request
2. -4 - Option for curl to prefer IPv4 addresses over IPv6 for domain resolution
3. icanhazip.com - Public domain that returns an IP address when queried
Command Breakdown
wget:
wget -qO- ifconfig.me/ip

1. wget - Command line tool that can make web request
2. -q - Option for wget to run in quiet mode suppressing status output
3. -O - Option for output - specifies stdout as the output type (O not zero)
4. ifconfig.co/ip - Public domain that returns an IP address when queried
Occasionally, arbitrary outbound http access is not available. For instance, a network that requires authentication to join could use network access controls (NAC) to redirect all unauthenticated web traffic to a captive portal. Networks using authenticated proxies or whitelisting controls can also provide egress challenges. In these situations outbound DNS traffic is often still required and therefore available. In these cases the dig command has got you covered!
Command Breakdown
dig:
dig +short myip.opendns.com @resolver1.opendns.com

1. dig - Command line tool for interrogating DNS name servers
2. +short - Option for dig to provide an abbreviated response
3. myip.opendns.com - Host to resolve
4. @resolver1.opendns.com - DNS server to query

But wait, there's more!
So what if curl, wget, and dig are all unavailable? Perhaps the network is blocking opendns.com, ifconfig.me, and icanhazip.com?
telnet and ftp can provide alternative, if clunky, solutions. telnet like nc can make TCP connections to any port specified. This can be used to connect to a server owned by you, to connect to a telnet public ip service (port 23), or connect to a web server as a client. telnet has the added benefit of working from Windows systems as well however, the command must be enabled in order to do so. Some ftp servers respond to failed login requests with the IP address that attempted and failed to connect. We can utilize this behavior to determine public IP address as well.
Command Breakdown
telnet: telnet myip.gelma.net
telnet myip.gelma.net
GET /plain HTTP/1.1
HOST: ipecho.net

1. telnet myip.gelma.net - Connect to telnet service that responds with Public IP Address
Command Breakdown
telnet + nc:
nc -vlp 9000
telnet [hostname/IP Address] 9000
.jpg)
1. nc -vlp 9000 - Run on your publicly available server to open a listening port
2. telnet [hostname/IP Address] 9000 - Connect to remote netcat listener
Netcat prints information on newly established connections to stdout (Connection from X.X.X.X)
Command Breakdown
telnet as a web client: telnet ipecho.net 80
telnet ipecho.net 80
GET /plain HTTP/1.1
HOST: ipecho.net

1. telnet ipecho.net 80 - Connect to web server with telnet
2. GET /plain HTTP/1.1 - HTTP Protocol syntax for GET request
3. HOST: ipecho.net - HTTP Protocol HOST header
Command Breakdown
ftp:
echo close | ftp ifcfg.me

Bonus
We've beaten the proverbial Linux horse to death, but what about Windows? As a bonus, here's an option in PowerShell:
Invoke-RestMethod http://ipinfo.io/json | Select -exp ip
Conclusion
There are tons of different ways this task can be accomplished and many different tools at your disposal to do so. If you have a favorite or unique take on determining the public IP address of a Linux system from the command line please share in the comments below!
Matthew Toussain
https://twitter.com/0sm0s1z


