Computer Forensic Guide To Profiling USB Drive Enclosures on Win7, Vista, and XP
There has been much talk about USB Device Forensic Analysis. Many assume that analyzing a USB Key will be the same as analyzing a USB Drive Enclosure (e.g. USB Key Analysis = USB Drive Enclosure analysis). This is inaccurate.
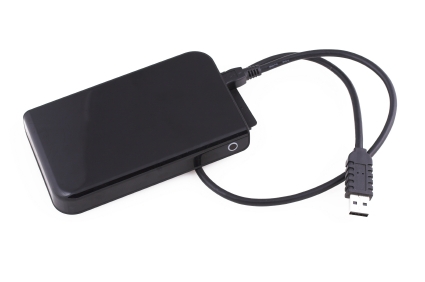
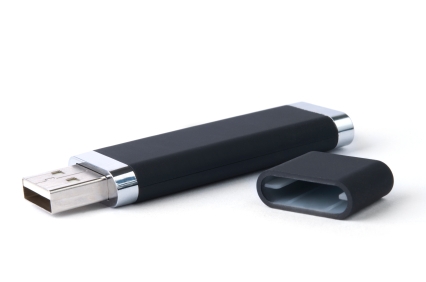
The fundamentals of examining a USB Key and a USB Drive Enclosure are similar, but have some unique properties that require a different set of guidelines to account for the differences. I have created a new guide that you can download at the bottom of this post that will step you through how to forensicate USB Drive Enclosures for XP, VISTA, and Win7.
The fundamentals of the USB examinations are the same with a couple of key exceptions.
- There will not be a ParentIDPrefix created for these devices.
- You cannot figure out the device GUID by searching for the Serial Number in the SYSTEM\MountedDevices Key.
MBR Disk Signatures
The information that is needed is the MBR Disk Signature that is located in the MBR, it is a 4-byte value. I have not had the chance to test this with a GPT table, but according to the fifth edition of Windows Internals, it is supposed to use the GUID instead of the Disk itself.
How does this work? First, written in the MBR at decimal offset 440 will be the MBR Disk Signature. These signatures are kept in HKEY_LOCAL_MACHINE\SYSTEM\MountedDevices for connecting disk partitions and drive letters. This 4-byte value is written to the disk. If the disk does not have a MBR Disk Signature, windows will create one for it.
Example 1:
Here is the first example:

Finding the Registry Key HKEY_LOCAL_MACHINE\SYSTEM\MountedDevices we will locate the signature in one of the drive letters and GUID found there:

Once we have located the key, we can find the MBR Disk Signature in the MountedDevices Key:

You can see the value is 5e 82 A0 EC. However, you might be wondering what the 8 bytes of information that immediately follows it. Those bytes (00 00 10 00 00 00 00 00) is the byte offset of the location of the beginning of the partition. If you convert to little endian and covert to decimal the value stored in those 8 bytes = 1048576 bytes. If you divide by the sector size (512 bytes), the value would be sector address 2048. If you look in the MBR above, you can see that the first partition begins at sector address (00 08 00 00 = sector 2048). The last 8 bytes of the signature stored in the registry key point to the byte offset of the start of the partition itself after you convert the bytes into the sector address.
Why is this? Simple. If you have a drive enclosure or a disk drive with two or more partitions, the MBR Disk Signature will be the same. Therefore, the last 8 bytes are needed to tell one partition apart from the other at the operating system. In some cases, you will have two partitions that have the exact same MBR Disk Signature, but are two different partitions from the same drive.
Here is another example:
In the above example, we can see the MBR Signature is a2 ee b2 28. We can see one partition is located at byte offset (00 00 10 00 00 00 00 00 = 1048576) 1048576/512 = Sector 2048. In the second one, we can see the second partition located at byte offset (00 00 50 06 00 00 00 00 = 105906176 bytes) 105906176 bytes/512 bytes = Sector address 206848.
Example 2:
Here is the MBR Disk Identity found at decimal offset 440 in another drive enclosure:
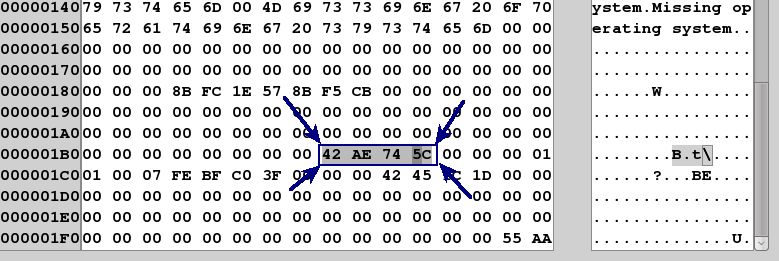
The MBR Disk Signature is 42 AE 74 5C. We can also see that this is an NTFS Partition (0x07) and the begginning of the partition starts at sector address (3f 00 00 00 or Sector 63). If we convert that to a byte offset, we multiple 63*512 bytes = 32256 which would be (00 7e 00 00 00 00 00 00) for the 8 byte partition beginning.
So for the partition located in this disk image we should find a disk signature and partition beginning noted by the following:
42 AE 74 5C 00 7E 00 00 00 00 00 00
We will now look in the HKEY_LOCAL_MACHINE\SYSTEM\MountedDevices and compare the values there:

As you can see above, we found it. The key is identifying the MBR Disk Signature and if needed, we can identify the specific partition by looking at the 8 bytes following it.
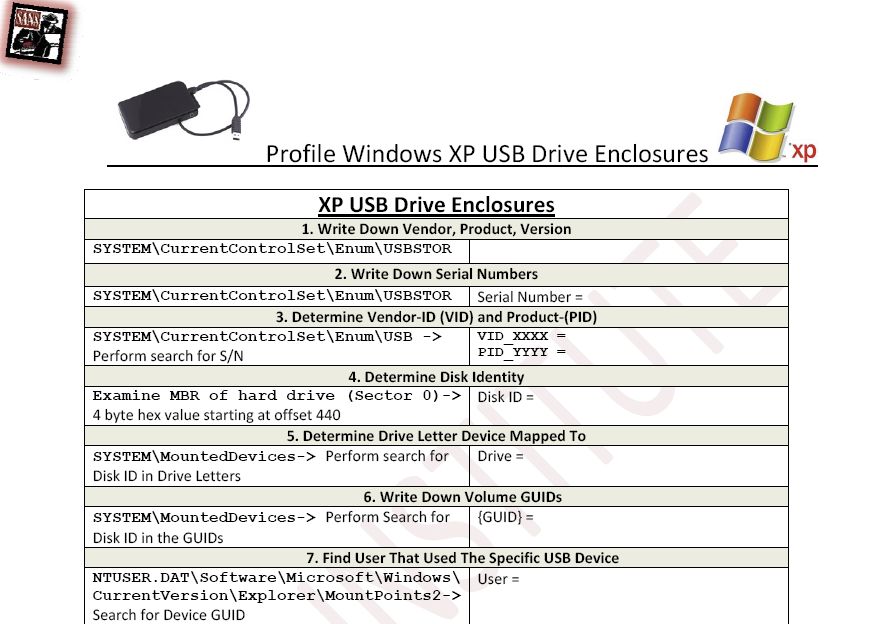
USB Drive Enclosure Examination Guide
Because of this new information, I have updated the USB Forensic Guide to account for this information and created a new guide that will follow this process in XP, VISTA, and Win7.
The USB Drive Enclosure guide can be found here:
Some caveats.
- If you do not have the disk drive or enclosure when you begin forensication, I am still figuring out a way to map the GUID to the drive without knowing the MBR Disk Signature. If you have any thoughts on how to solve this challenge, please let me know. I am still looking for another way to figure out how to do that without having the drive handy.
- This guide assumes there is a single partition. If you have more than one patition, you will need to figure out the specific starting sector, convert it to byte offset in 8 byte little endian format to find the specific device in the MountedDevices key.
Forensicate Away!
This material was created as a part of SEC408: Computer Forensic Essentials. SANS Security 408: Computer Forensic Essentials focuses on the essentials that a forensic investigator must know to investigate core computer crime incidents successfully. You will learn how computer forensic analysts focus on collecting and analyzing data from computer systems to track user-based activity that could be used internally or in civil/criminal litigation.
Rob Lee is a Director for MANDIANT, a leading provider of information security consulting services and software to Fortune 500 organizations and the U.S. Government. Rob has over 13 years experience in computer forensics, vulnerability discovery, intrusion detection and incident response. Rob is the lead course author and faculty fellow for the computer forensic courses at the SANS Institute. In his spare time, he is now pondering creating additional guides for eSATA and Firewire Devices.

